If you manage customer outreach, sales follow-ups, or event invites, you probably keep your contacts in a spreadsheet. With Rocket Sender, that spreadsheet becomes a direct launch pad for personalized WhatsApp messages — no API keys, no technical setup, and no tedious copy-paste.
Step 1 — Install Rocket Sender
Before anything else, you need the Rocket Sender Chrome extension installed. Head to the Chrome Web Store and click Add to Chrome. The whole process takes under a minute.
Once installed, open WhatsApp Web and scan the QR code as usual. You'll see the Rocket Sender panel appear in the upper-right corner of the page.
Step 2 — Prepare Your Excel Spreadsheet
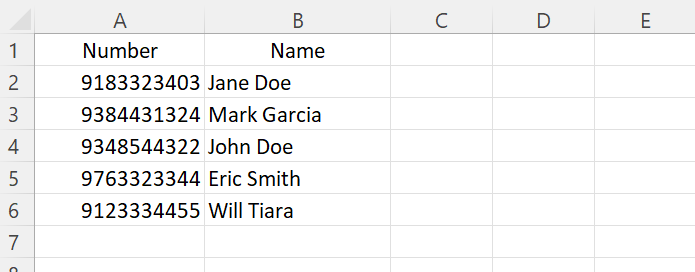
Open Excel (or Google Sheets) and create a new file. At minimum, you need a column for phone numbers — but the real power comes from adding extra columns like Name, Company, or any other field you want to personalize your message with.
Make sure every phone number includes its country code (e.g. +14155552671). Missing country codes are the most common cause of failed sends.
Step 3 — Save as CSV
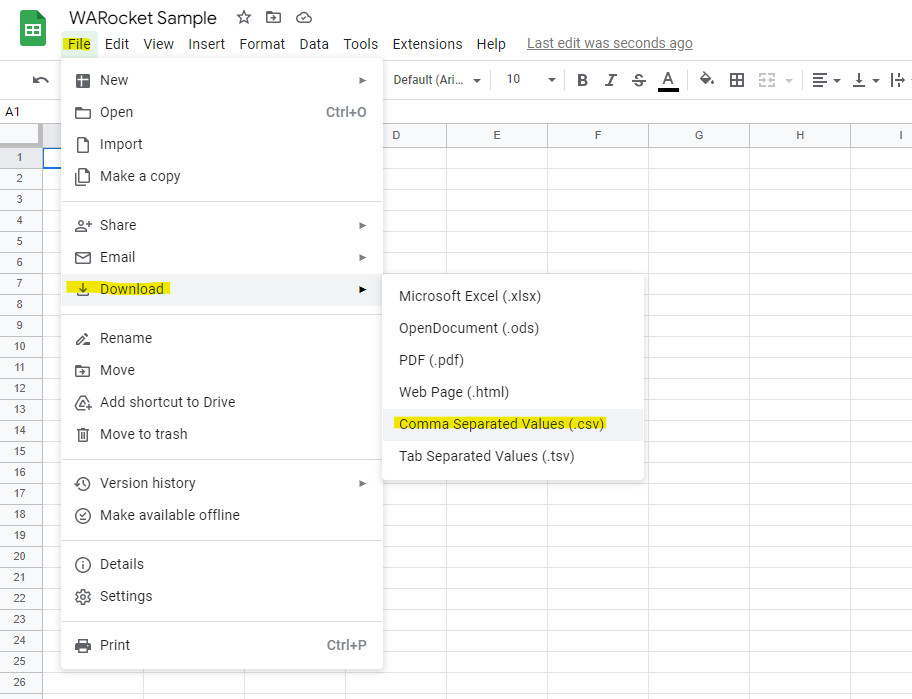
Rocket Sender reads CSV files. In Excel, go to File → Save As and choose CSV (Comma delimited). In Google Sheets, use File → Download → Comma-separated values (.csv).

Step 4 — Upload the CSV in Rocket Sender
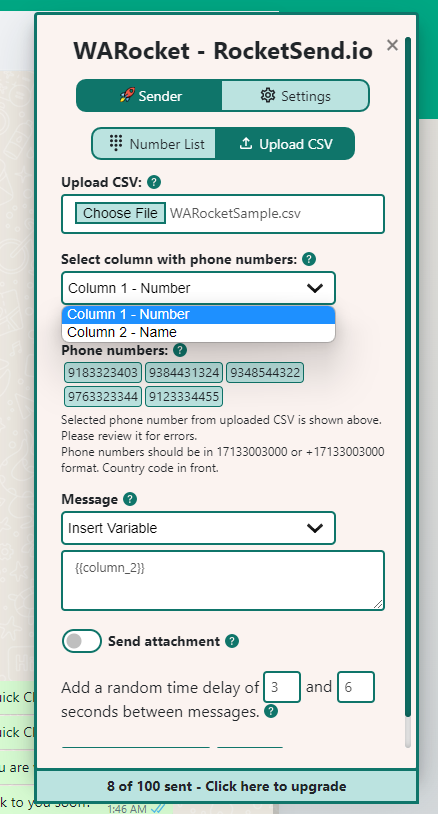
Back in WhatsApp Web, click the Upload CSV button in the Rocket Sender panel and select the file you just saved. Your contacts will load instantly.
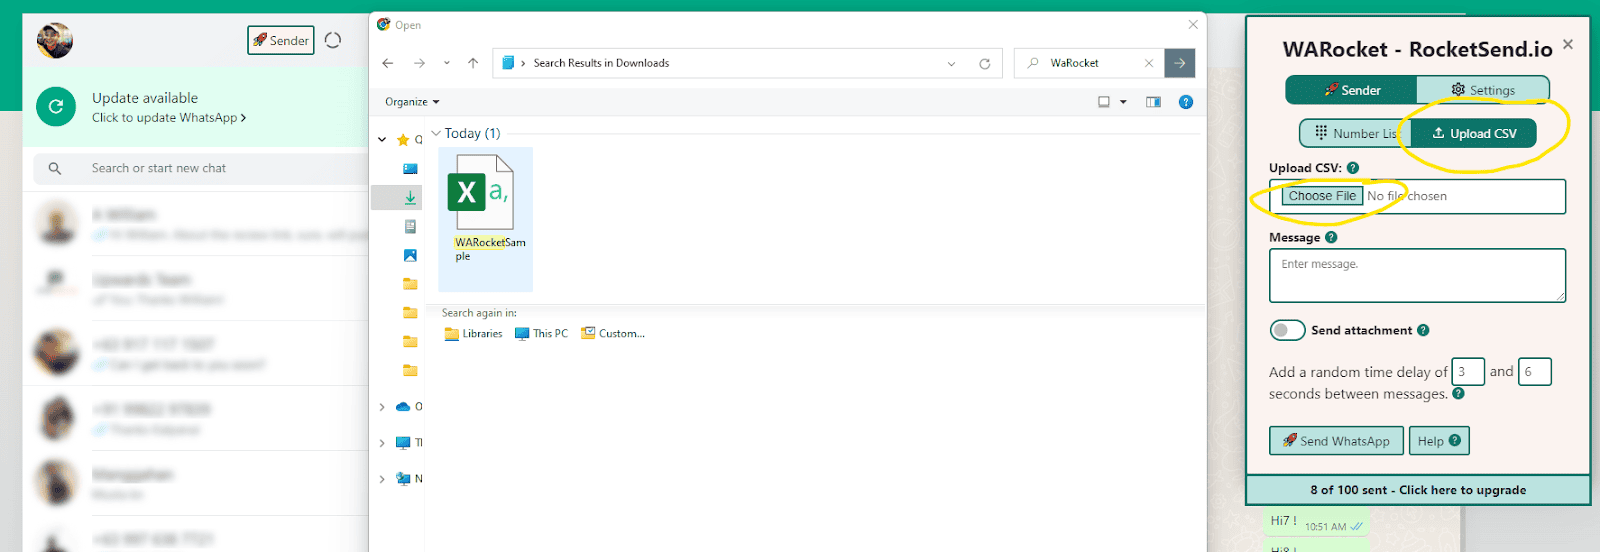
Next, map the phone number column to the correct field. Rocket Sender will ask you to identify which column holds your phone numbers.
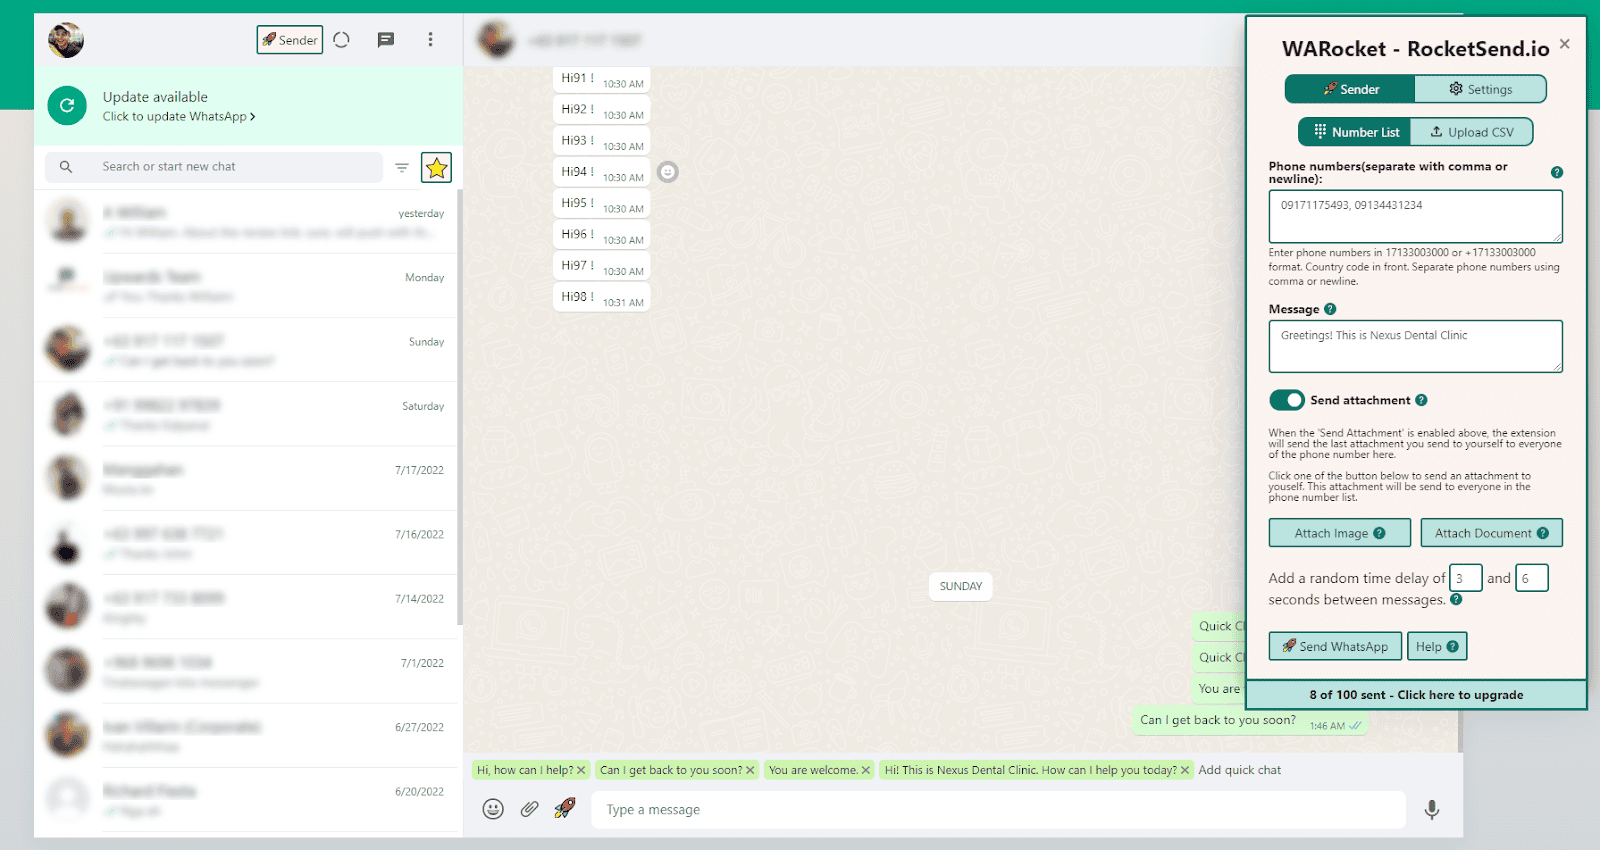
Step 5 — Write Your Personalized Message
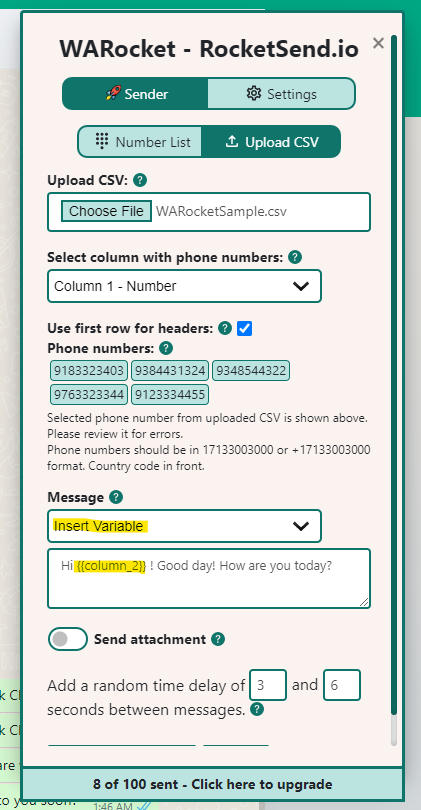
In the message box, write your message. To insert a personalized value from your spreadsheet, click Insert Variable and pick the column you want — for example, Name. It gets inserted as {{Name}} and Rocket Sender replaces it with each contact's actual name before sending.
Step 6 — Send
When you're satisfied with your message, click Send WhatsApp. Rocket Sender works through your connected WhatsApp account, dispatching each message with a smart delay to protect your account from being flagged.

No Microsoft Excel? No problem. Google Sheets works identically — just download your sheet as CSV and follow the same steps above.
Video Walkthrough
Wrapping Up
Sending personalized WhatsApp messages from a spreadsheet used to require expensive API integrations. With Rocket Sender, the whole flow — import, personalize, send — takes a few minutes and works directly inside WhatsApp Web. Your contacts get individual messages; you send them at scale.
Ready to try it? Install Rocket Sender for free and run your first campaign today.